 LASER CUT RECORD
 ARDUINODSP
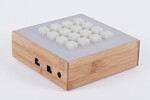 SUGARCUBE
 SHELL FORM FINDING
In order to test the current limits of 3D printing, I created a technique for converting digital audio recordings into 3D-printable, 33rpm records that play on ordinary turntables. Though the audio quality is low, the songs encoded on these records are still easily recognizable. The 3D modeling in this project was too complex to do by hand, so I wrote a Processing program to do this conversion automatically. It works by importing raw audio data, performing some calculations to generate the geometry of a 12" record, and eventually exporting this geometry straight to a 3D printable file format.
I initially came up with this idea after many experiments with very low resolution, real-time digital signal processing on an Arduino. Through these projects, I learned that audio is a very resilient medium; it can take a fair amount of distortion and compression while still maintaining most of the integrity of the original sound. We have biology to thank for this: as we hear audio, some complicated processing goes on in our brains that makes us very good at ignoring noise and focusing on the important pieces of information coming through. We can work off of relatively few cues to piece together mangled or noisy audio and make sense of it.
I printed these records on an Objet Connex 500, a high-end UV-cured resin printer. Like most 3D printers, it creates an object by depositing material layer by layer until a final form is built. The Objet prints with tiny resin droplets at a resolution of 600dpi in the x and y axes and 16 microns in the z axis. Even with this precision, the smallest features printed by an Objet are at least 1 or 2 orders of magnitude larger than those on a real vinyl record. After a lot of experimentation and parameter tuning, I was able to produce records with a sampling rate of 11 kHz and 5-6 bits of resolution per sample. A detailed discussion of the development process, code, and downloadable 3D record files can be found on Instructables.
This video shows the entire record-making process and features some of the audio I've been able to reproduce. The process is broken up into a few steps: audio preprocessing, model generation, and printing. Because the sampling rate of the records is much lower than the typical 44.1kHz sampling rate of a digital recording, I apply a low pass filter to remove high frequency components before constructing the 3D model. I also apply RIAA equalization to counteract the frequency response of the phono preamp used during playback. As I programmatically generate a 3D model of a spiral groove wrapping around the surface of a record, I use information contained in the processed audio recording to modulate the depth of the groove. The resulting model is saved and sent to the printer, where it is converted to a series of layers to print from small droplets of resin. After one layer of resin is deposited on the print bed, it's cured by a set of bright UV lights and the next layer of resin is deposited on top; this continues until the model is finished printing (about 100 layers). From there, the model is cleaned and can immediately be played on an ordinary turntable.
My code takes raw data from a digital recording and uses it to modulate the depth of the record groove to match the original waveform of the song. If you look carefully at the following closeup images, you can see the waveform traced out by the bottom of the groove. The waves are oriented vertically relative to surface of the record and cause the needle to vibrate up and down as it moves across the groove, recreating the original audio signal. The geometry of the record is calculated as a mesh of triangular faces and saved as an STL file using the ModelBuilder Library.
Stereo (2 channel) vinyl records are cut both vertically and laterally, this way it’s possible for two isolated channels of audio to fit into one groove. I chose to encode audio information vertically within the groove because the 3D printer I used was most precise along its vertical axis. With the exception of Edison cylinders, mono recordings are typically cut laterally for better quality and higher dynamic range.


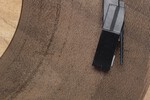
Closeup of an STL model used to create a 3D printed record, showing the individual triangles that make up the mesh. A full record side results in a mesh composed of about 10 million triangular faces. The depth of the groove traces out an audio waveform.
More audio examples.


Record model cross section, spanning many grooves.

Objet printer in action, making a record from UV-cured resin.